

How to swap stromer st2 button ring kit – Want to upgrade your Stromer ST2’s control panel? Swapping the button ring kit can give you a new level of customization and functionality. This guide will walk you through the process step-by-step, ensuring a smooth and successful installation.
We’ll cover everything from the tools you’ll need and safety precautions to take, to troubleshooting common issues that might arise. Get ready to take your Stromer ST2 to the next level with a fresh button ring kit!
Understanding the Stromer ST2 Button Ring Kit
The Stromer ST2 Button Ring Kit is a crucial component for enhancing the user experience of your Stromer ST2 e-bike. It provides a convenient and intuitive way to control various functions of your bike, making your rides smoother and more enjoyable.
Components of the Button Ring Kit
The Stromer ST2 Button Ring Kit comprises several essential components that work together to provide a comprehensive control interface.
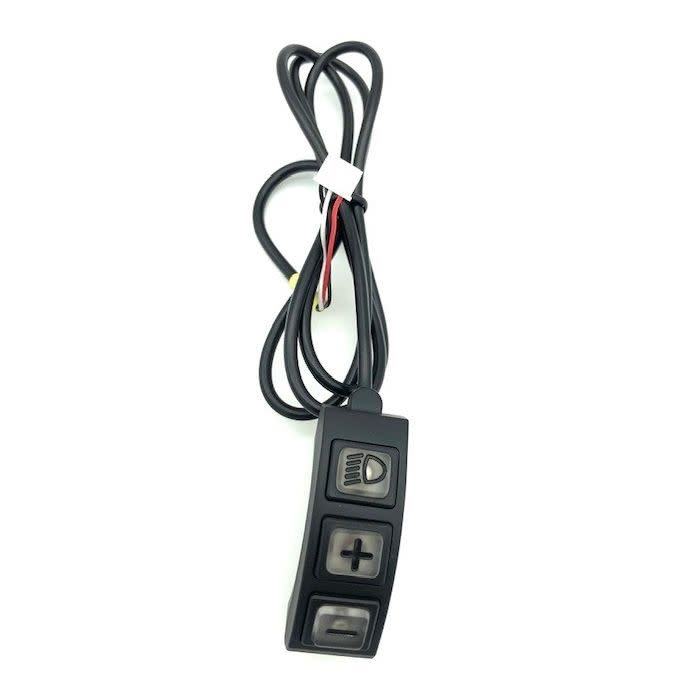
- Button Ring: This circular ring features multiple buttons that are strategically placed for easy access and intuitive operation. The button ring allows you to control various functions, such as shifting gears, activating the electric motor, and adjusting the display settings.
- Display: The display unit provides you with vital information about your ride, such as speed, battery level, and distance traveled. It’s typically mounted on the handlebars for easy visibility.
- Wiring Harness: The wiring harness connects the button ring to the display and the bike’s electrical system. It ensures smooth communication between the different components.
- Mounting Hardware: The kit includes necessary hardware for mounting the button ring and display on your handlebars. This ensures a secure and stable installation.
Benefits of Using the Button Ring Kit
The Stromer ST2 Button Ring Kit offers a wide range of benefits, enhancing your riding experience and making your e-bike more user-friendly.
- Convenient Control: The button ring provides a centralized and intuitive way to control all the essential functions of your e-bike. This eliminates the need for multiple buttons or switches scattered around the handlebars, making your rides less cluttered and more enjoyable.
- Improved Ergonomics: The button ring’s design and placement prioritize ergonomics, ensuring that the controls are easily accessible and comfortable to use. This reduces strain on your hands and wrists, making your rides more comfortable, especially during extended journeys.
- Enhanced Safety: The button ring’s intuitive layout and clear display ensure that you can easily access essential information and controls without taking your hands off the handlebars. This enhances your safety by allowing you to maintain control of your bike at all times.
- Customizability: Some button ring kits offer customization options, allowing you to tailor the functions of the buttons to your specific preferences. This enables you to prioritize the features that are most important to you, enhancing your overall riding experience.
Preparing for the Swap
The process of swapping the button ring kit on your Stromer ST2 requires careful preparation to ensure a smooth and successful operation. It’s crucial to have the right tools and materials on hand and to take necessary safety precautions before embarking on this task.
Tools and Materials
Having the correct tools and materials is essential for a successful button ring kit swap. This ensures you have everything you need at hand and eliminates the need to search for them during the process.
- Phillips screwdriver (PH2 size)
- Torx screwdriver (T25 size)
- Small flathead screwdriver
- Anti-static wrist strap
- Cleaning cloth
- New Stromer ST2 button ring kit
Safety Precautions
Safety should always be paramount during any mechanical work. It’s essential to take precautions to prevent accidents and potential damage to your e-bike.
- Work in a well-lit and ventilated area.
- Disconnect the battery from the Stromer ST2 before starting any work on the electrical system.
- Use an anti-static wrist strap to prevent electrostatic discharge that could damage sensitive electronic components.
- Keep all tools and parts organized to avoid losing them.
Verifying the Button Ring Kit
It’s crucial to ensure that the button ring kit you have is compatible with your Stromer ST2 model. Using the wrong kit could lead to compatibility issues and potential damage.
- Check the model number and version of the button ring kit.
- Compare it with the specifications of your Stromer ST2.
- Ensure they match before proceeding with the swap.
Step-by-Step Swap Procedure

With the tools gathered and the bike prepped, it’s time to embark on the button ring swap. This procedure, though intricate, can be navigated with patience and a keen eye. Follow these steps carefully to ensure a smooth and successful replacement.
Disassembling the Original Button Ring, How to swap stromer st2 button ring kit
This stage involves carefully removing the existing button ring.
- Locate the small screws holding the button ring to the handlebar. These screws are typically located on the underside of the ring.
- Use a small Phillips screwdriver to loosen and remove these screws. Take note of their position and order for reassembly.
- Once the screws are removed, gently pull the button ring off the handlebar. Be careful not to damage the wiring or the handlebar.
Installing the New Button Ring
Now that the old button ring is off, we’ll install the new one.
- Align the new button ring with the handlebar, ensuring it’s correctly positioned. Refer to the original button ring for guidance.
- Carefully push the new button ring onto the handlebar, ensuring it’s seated firmly.
- Reinstall the screws, ensuring they are securely fastened. Refer to the torque specifications provided with the button ring kit for proper tightening.
Connecting the Wiring
The button ring houses the electrical connections for the bike’s controls. This step requires precision.
- Carefully disconnect the wiring harness from the old button ring. Note the color coding of the wires for accurate reconnection.
- Connect the wiring harness to the new button ring, matching the color codes of the wires. Ensure a secure connection.
- Test the functionality of the new button ring by activating each button. This ensures proper connection and functionality.
Troubleshooting Tips
During the swap, you might encounter some challenges.
- If the buttons are not responding, double-check the wiring connections. Ensure all wires are securely connected and that the color codes match.
- If the button ring is loose or wobbly, tighten the screws. Ensure they are fastened to the specified torque.
- If you encounter any other issues, consult the Stromer ST2 manual or contact Stromer support for assistance.
Post-Swap Configuration and Testing

The final stage of swapping your Stromer ST2 button ring kit involves configuring and testing the new setup to ensure optimal functionality. This involves a series of steps that will guarantee a seamless integration of the new button ring kit with your Stromer ST2 e-bike.
Configuring the Button Ring Kit
The new button ring kit requires minimal configuration, but it’s essential to ensure it’s properly recognized by the bike’s system.
- Power Cycle: Turn off the bike’s power and disconnect the battery. Wait for a few seconds, then reconnect the battery and turn the power back on. This simple step allows the system to recognize the new button ring kit.
- Check Display: Once the bike is powered on, observe the display to ensure the new button ring kit is correctly recognized. If you see any error messages or unusual behavior, refer to the Stromer user manual or contact Stromer customer support for assistance.
Testing the Functionality
After the configuration is complete, it’s crucial to test the new button ring kit to ensure all buttons are working correctly.
- Button Functionality: Go through each button on the new button ring kit, testing its functionality. This includes pressing each button and observing its corresponding action on the display and the bike’s behavior. For instance, pressing the “plus” button should increase the assist level, while the “minus” button should decrease it.
- Throttle Response: If your Stromer ST2 has a throttle, test its responsiveness. Ensure the throttle reacts smoothly and consistently to your input, accelerating the bike as expected.
- Shifting: If your Stromer ST2 has a gear shifting system, test the functionality of the gear shifting buttons on the new button ring kit. Shift through the gears, ensuring smooth and accurate gear changes.
Calibrating the System
In some cases, you may need to calibrate the new button ring kit to ensure accurate and responsive functionality.
- Calibration Procedure: Refer to the Stromer user manual for the specific calibration procedure for your model. The calibration process might involve holding specific buttons for a designated period or following a specific sequence of actions. This process allows the system to learn the new button ring kit’s configuration and optimize its responsiveness.
- Stromer Support: If you’re unsure about the calibration procedure or encounter any issues, contact Stromer customer support. They can provide detailed instructions and assistance with the calibration process.
Troubleshooting Common Issues
Even with careful attention to the swap procedure, you may encounter some issues. These are usually minor and can be addressed with a few troubleshooting steps.
Button Ring Not Responding
This issue may occur if the button ring is not properly connected or if there is a problem with the wiring.
- Check the Connections: Carefully inspect the connection between the button ring and the controller. Ensure the connector is fully seated and that there are no loose wires.
- Inspect the Wiring: Examine the wiring for any damage or kinks. If you find any issues, try to repair or replace the damaged section.
- Test with a Multimeter: If you have a multimeter, you can use it to test the continuity of the wires between the button ring and the controller. This will help identify any breaks or short circuits.
Incorrect Button Function
If you find that the buttons on the new ring are not functioning as expected, this could be due to incorrect wiring or a misconfigured button mapping.
- Double-Check the Wiring: Ensure that the wires are connected to the correct pins on the controller. Refer to the wiring diagram for your specific button ring kit.
- Adjust Button Mapping: Most Stromer ST2 controllers allow you to customize the button mapping. Access the controller settings and adjust the button functions to match the new button ring.
Battery Issues
If the battery is not charging or is not providing power to the bike, the issue may lie with the battery itself, the charging port, or the wiring.
- Check Battery Connection: Ensure the battery is properly connected to the controller. Check for any loose or damaged connections.
- Inspect the Charging Port: Examine the charging port for any debris or damage. Clean the port if necessary.
- Test the Charging Circuit: If the battery is not charging, you can test the charging circuit with a multimeter. Check for continuity between the charging port and the battery.
Error Messages on the Display
The Stromer ST2 display may show error messages if there is a problem with the bike’s system.
- Consult the User Manual: Refer to the Stromer ST2 user manual for a list of common error codes and their corresponding solutions.
- Reset the Controller: Sometimes, a simple reset of the controller can resolve minor errors. Consult your user manual for the specific reset procedure.
- Contact Stromer Support: If you are unable to resolve the issue, contact Stromer support for assistance. They can provide troubleshooting guidance or suggest a repair if necessary.
Performance Issues
After the swap, you may experience some performance issues, such as reduced speed or range.
- Check for Loose Connections: Ensure that all connections are secure, especially the wiring between the button ring, controller, and battery.
- Calibrate the Motor: Some Stromer ST2 models require motor calibration after certain repairs or modifications. Consult your user manual for the specific calibration procedure.
- Update Firmware: If your Stromer ST2 has an outdated firmware version, it may be causing performance issues. Check for available firmware updates and install them if necessary.
By following these steps and taking the necessary precautions, you’ll be able to confidently swap your Stromer ST2 button ring kit. Remember, if you encounter any difficulties, consult the manufacturer’s documentation or seek assistance from a qualified technician. Enjoy the new features and improved functionality of your upgraded control panel!
FAQ Corner: How To Swap Stromer St2 Button Ring Kit
What if I don’t have the correct button ring kit for my Stromer ST2?
Using an incompatible kit can lead to issues and may damage your bike. Ensure you have the right model and version before proceeding.
Is it possible to swap the button ring kit myself, or should I take it to a professional?
While it’s possible to do it yourself, if you’re not comfortable with bike mechanics, it’s best to have a professional handle the swap.
What are the benefits of upgrading the button ring kit?
You can get new features, improved ergonomics, and even a more stylish look for your Stromer ST2.


