How to design a crochet pattern? It’s a question that many crocheters ponder, dreaming of creating their own unique and beautiful designs. The journey from crafting a simple square to crafting a complex garment is a fascinating one, filled with creativity and the satisfaction of bringing your ideas to life. This guide will walk you through the essential steps, from understanding the fundamentals of crochet to testing and refining your final pattern.
Designing your own crochet pattern is a rewarding experience that allows you to express your creativity and create something truly unique. It’s a process that combines technical knowledge with artistic vision, enabling you to translate your ideas into tangible, beautiful pieces. Whether you envision a simple scarf or a intricate blanket, this guide will empower you to embark on your own design journey.
Understanding Crochet Basics
Before diving into designing your own crochet patterns, it’s essential to have a solid foundation in the fundamentals of crochet. This includes understanding the basic stitches, choosing the right yarn and hook, and mastering consistent tension.
Fundamental Crochet Stitches
Crocheting is all about creating loops with yarn using a crochet hook. The foundation of crochet lies in mastering a few basic stitches, each forming the basis for more intricate patterns. Here are some common stitches:
- Single Crochet (sc): This is the simplest stitch, creating a tight and compact fabric. It is formed by inserting the hook into the stitch, pulling up a loop of yarn, and then pulling the loop through the existing loop on the hook.
- Double Crochet (dc): This stitch creates a taller and looser fabric compared to single crochet. It is formed by making a yarn over (yo), inserting the hook into the stitch, pulling up a loop, yo, and then pulling the loop through two loops on the hook.
- Half Double Crochet (hdc): This stitch falls between single and double crochet in height and tightness. It is formed by yo, inserting the hook into the stitch, pulling up a loop, and then pulling the loop through all three loops on the hook.
- Triple Crochet (tr): This stitch creates the tallest and loosest fabric among the basic stitches. It is formed by yo twice, inserting the hook into the stitch, pulling up a loop, yo, and then pulling the loop through two loops on the hook, followed by pulling the loop through the remaining two loops on the hook.
Choosing the Right Yarn and Hook
Yarn and hook selection plays a crucial role in determining the final look and feel of your crochet project. Here’s what to consider:
- Yarn Weight: Yarn weight refers to the thickness of the yarn, typically categorized by numbers from 0 to 7. The higher the number, the thicker the yarn. Choose a yarn weight that complements your project and desired fabric texture.
- Yarn Fiber: Different fibers offer unique characteristics. Cotton is durable and breathable, wool is warm and soft, acrylic is affordable and versatile, and many other fibers are available. Consider the project’s purpose and desired properties when selecting a fiber.
- Hook Size: The hook size should correspond to the yarn weight to achieve the intended gauge. Use a hook size recommended by the yarn manufacturer or experiment to find the best combination for your project.
Maintaining Consistent Gauge
Gauge refers to the number of stitches and rows per inch (or centimeter) of your crochet fabric. Maintaining consistent gauge is crucial for ensuring your project turns out the intended size and shape. Here’s how to achieve it:
- Practice: Practice crocheting with your chosen yarn and hook to develop a consistent tension. Pay attention to the tightness or looseness of your stitches.
- Gauge Swatch: Before starting your project, create a gauge swatch using the same yarn and hook. Measure the number of stitches and rows within a specified area to determine your gauge. Adjust your tension if necessary to match the recommended gauge for the pattern.
- Use a Tension Ring: A tension ring is a tool that helps maintain consistent tension by providing a visual guide for the size of your stitches. It can be particularly helpful for beginners.
Designing the Pattern Structure

Designing the structure of your crochet pattern is like building the foundation of a house. It’s the framework that determines the shape, size, and overall look of your finished project. This section will guide you through the process of creating a basic pattern structure, incorporating different stitches, and adding visual appeal with color changes or textured elements.
Basic Pattern Structure
A basic crochet pattern structure typically includes three key elements: a starting chain, rows, and stitch repetitions.
- Starting Chain: This forms the foundation of your project and determines its width. The number of chains you create will directly impact the width of your finished piece. For example, a scarf might require a longer starting chain than a small coaster.
- Rows: Rows are the horizontal layers that build up your crochet piece. Each row is created by working stitches into the previous row. The number of rows you work will determine the length of your project.
- Stitch Repetitions: These are the patterns of stitches that you repeat across each row to create the desired texture and design. For instance, you might repeat a sequence of single crochet, double crochet, and treble crochet stitches to create a simple, yet visually interesting pattern.
Incorporating Different Stitch Patterns
Adding variety to your crochet patterns through different stitches can enhance their visual appeal and complexity. Here are some popular stitches to experiment with:
- Single Crochet (sc): This is a basic stitch that creates a tight, dense fabric. It’s often used for sturdy projects like blankets or bags.
- Double Crochet (dc): This stitch creates a taller, looser fabric than single crochet. It’s suitable for projects that need a bit more drape, like scarves or shawls.
- Treble Crochet (tr): This stitch is even taller than double crochet and creates an airy, open fabric. It’s often used for lightweight projects like lace doilies or summer tops.
Adding Color Changes or Textured Elements
To elevate your crochet patterns beyond basic stitch combinations, consider incorporating color changes or textured elements.
- Color Changes: Introducing different colors into your crochet can create stunning visual effects. You can change colors at the beginning of a new row or within a row to create stripes, gradients, or intricate designs.
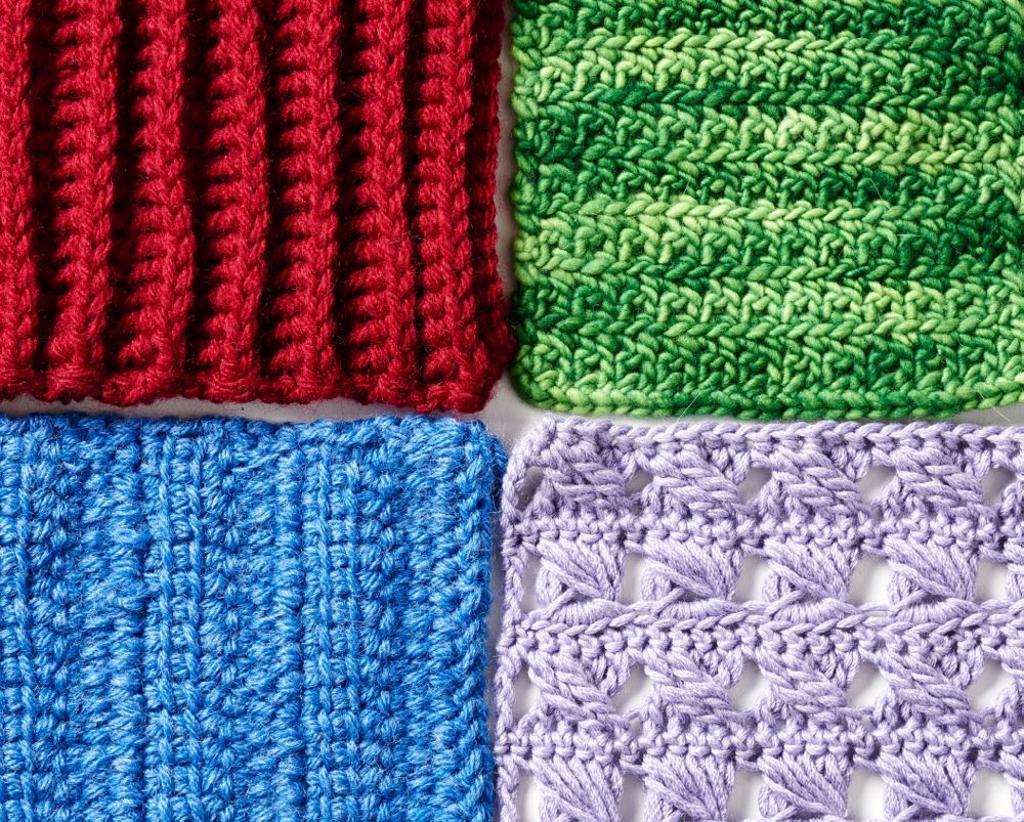
- Textured Elements: You can add texture to your crochet by using different stitch combinations or techniques. For instance, you can create raised bumps, textured stripes, or intricate patterns by varying the types of stitches you use.
Writing Clear and Concise Instructions: How To Design A Crochet Pattern

Clear and concise instructions are crucial for a successful crochet pattern. They ensure that crocheters of all skill levels can follow your design accurately.
Using Clear and Concise Language
- Use simple, straightforward language that is easy to understand. Avoid jargon or technical terms that may be unfamiliar to some crocheters. For example, instead of saying “single crochet two together,” write “sc2tog.”
- Be specific and detailed in your instructions. Don’t assume that crocheters will know what you mean without clear explanation. For example, instead of saying “chain 10,” specify “ch10, leaving a tail for attaching.”
- Use consistent language throughout your pattern. This helps to avoid confusion and makes it easier for crocheters to follow. For example, use the same abbreviation for a stitch throughout the entire pattern.
Using Abbreviations and Symbols
- Use standard crochet abbreviations and symbols that are widely understood. This makes your pattern more accessible to a wider audience.
- Include a list of abbreviations and symbols at the beginning of your pattern. This allows crocheters to quickly reference the meaning of any unfamiliar terms.
- Use abbreviations consistently throughout your pattern. This helps to avoid confusion and makes it easier for crocheters to follow.
Writing Instructions for Shaping
- Use clear and concise instructions for shaping techniques such as increasing, decreasing, and turning.
- Provide specific instructions for where and how to increase or decrease stitches. For example, “inc in next st” or “dec 2 sts tog.”
- Use arrows or other visual aids to illustrate the direction of stitches and shaping techniques.
Examples of Clear and Concise Instructions
Row 1: Ch 30, sc in 2nd ch from hook and in each ch across (29 sc).
Row 2: Ch 1, turn, sc in each st across (29 sc).
Row 3: Ch 1, turn, sc in each st across, inc in last st (30 sc).
Row 4: Ch 1, turn, sc in each st across (30 sc).
Creating a Pattern Chart

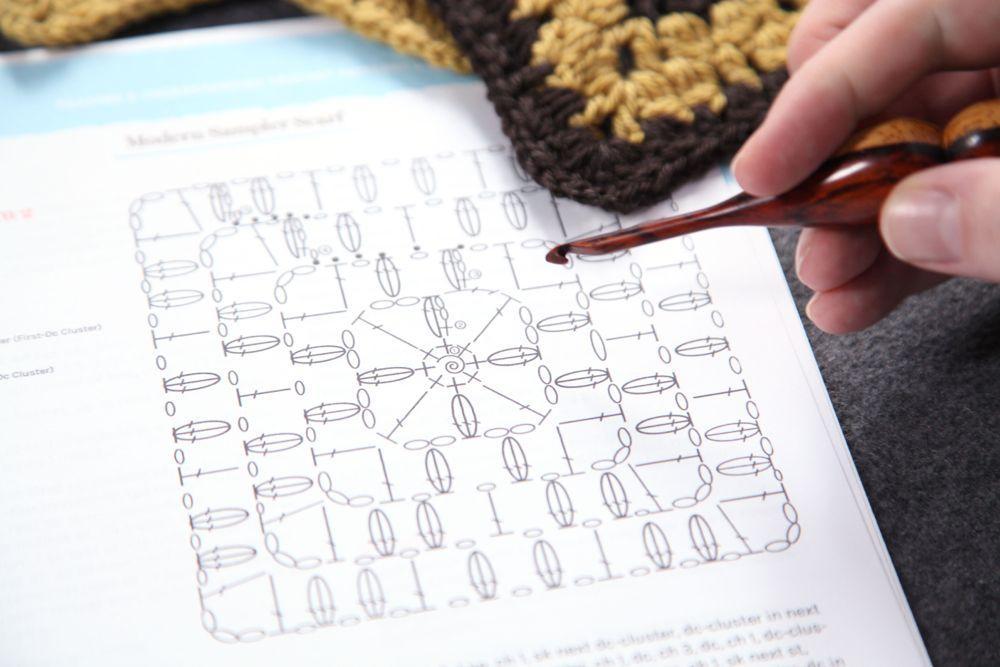
A crochet pattern chart is a visual representation of your crochet design. It uses symbols and color codes to illustrate the placement of each stitch, making it easier to understand and follow the pattern, especially for complex designs with multiple rows and stitch variations.
Understanding Crochet Chart Symbols
Crochet charts use symbols to represent different stitches. These symbols are standardized and universally understood by crocheters. The most common symbols include:
- Single Crochet (sc): A small square or a “x”
- Double Crochet (dc): A larger square or a “O”
- Half Double Crochet (hdc): A square with a diagonal line through it
- Triple Crochet (tr): A square with two diagonal lines through it
- Slip Stitch (sl st): A small circle or a dot
- Chain (ch): A line or a series of connected dots
Understanding Color Codes in Crochet Charts, How to design a crochet pattern
Color codes are used to distinguish different stitch types or to represent different colors in a multi-colored pattern.
- Black and White Charts: These charts use black symbols on a white background. Different stitches are represented by different symbols.
- Colored Charts: These charts use different colors to represent different stitch types or yarn colors.
Creating a Crochet Chart
Creating a crochet chart involves:
- Planning the Chart: Determine the size of your chart based on the number of stitches and rows in your pattern.
- Drawing the Grid: Draw a grid with squares representing each stitch. The number of squares across represents the number of stitches in a row, and the number of squares down represents the number of rows in your pattern.
- Filling in the Symbols: Place the correct symbols in the grid to represent the stitches in each row. Follow your written instructions to ensure accuracy.
- Adding Color Codes: If you’re using color codes, shade in the squares with the appropriate colors.
Creating a Chart for a Complex Pattern
Creating a chart for a complex pattern requires careful planning and attention to detail.
- Break Down the Pattern: Divide your pattern into smaller sections, like motifs or repeats.
- Create Individual Charts: Create separate charts for each section of the pattern.
- Combine the Charts: Combine the individual charts to form the complete chart for your pattern.
Example of a Crochet Chart
Let’s say you’re creating a simple granny square pattern. You would use the following symbols:
- Single Crochet (sc): A small square or an “x”
- Double Crochet (dc): A larger square or a “O”
- Chain (ch): A line or a series of connected dots
Your chart might look like this:
[This is where a visual representation of the chart would be included. The chart would show the pattern of stitches in a grid format, using the symbols described above. For example, it might show a row of 3 double crochets (O), followed by 2 chain stitches (dots), followed by 3 double crochets (O). ]
The chart clearly shows the placement of each stitch, making it easier to follow the pattern and create the granny square.
The joy of creating a crochet pattern lies not only in the final product but also in the journey itself. From sketching out your initial ideas to meticulously crafting each row, every step is an opportunity to learn, experiment, and grow as a crocheter. So, embrace the process, trust your creativity, and let your passion guide you as you embark on the rewarding adventure of designing your own crochet patterns.
FAQ Corner
What are the best resources for learning crochet pattern design?
There are many excellent resources available online and in libraries, including books, websites, and video tutorials. Look for resources that provide clear instructions, detailed explanations, and examples of different pattern structures.
How do I choose the right yarn and hook size for my design?
Consider the weight and fiber content of the yarn, as well as the intended use of the project. A heavier yarn will create a thicker fabric, while a finer yarn will result in a more delicate piece. Choose a hook size that matches the yarn weight and creates the desired gauge.
What are some tips for creating visually appealing crochet patterns?
Incorporate different stitch patterns, textures, and color changes to add visual interest. Experiment with color gradients, stripes, and textured elements to create unique and eye-catching designs.


